How to Resurface a pool (Step-by Step Guide): Resurfacing your pool can give it a new lease on life and improve its general operation and longevity in addition to its cosmetic appeal. Resurfacing is a complete way to restore your pool’s original beauty and structural integrity, regardless of whether it has been worn out, cracked, or just lost its shine over time.
Read Also: How To Drill Into Stucco(Step by Step)
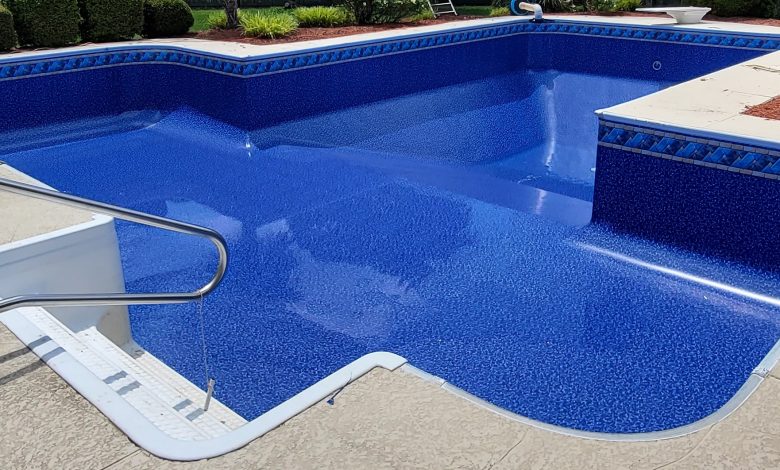
How to Resurface a pool A Step-by Step Guide
Read Also: How To Do Basic Home Repairs
Materials and Tools:
- Pool resurfacing material (such as plaster, pebble, or quartz)
- Chisel or jackhammer
- Pressure washer
- Concrete patch or bonding agent
- Trowels and plastering tools
- Pool paint (optional)
- Acid wash
- Pool finish (optional)
- Pool pump and filter (for draining water, if necessary)
- Safety gear (goggles, gloves, ear protection, etc.)
Read Also: How To Make Homemade Pasta(A Step-By-Step Guide)
Step 1: Drain the Pool
If the water level is not already low, use the pool pump and filter system to drain the pool. Follow safety guidelines for draining water from your pool, and be mindful of local regulations.
Step 2: Remove Old Surface
Read Also: How To Soften Grout For Removal
Step 3: Clean the Surface
Thoroughly clean the pool surface using a pressure washer to remove any remaining debris, dirt, or loose material. This ensures a proper bond for the new surface material.
Step 4: Repair Cracks and Holes
Patch any cracks or holes in the pool structure using a suitable concrete patch or bonding agent. Follow the manufacturer’s instructions for mixing and applying the patch material.
Read Also: How To Remove Wallpaper Easily(The Ultimate Guide)
Step 5: Acid Wash (Optional)
If you are using a plaster finish, an acid wash can be applied to the pool surface to etch it and create a better bond for the new plaster. Follow safety precautions, and ensure proper neutralization and rinsing afterward.
Step 6: Apply Bonding Agent (Optional)
Depending on the resurfacing material chosen, you may need to apply a bonding agent to enhance the adhesion of the new surface. Follow the manufacturer’s guidelines for applying the bonding agent.
Read Also: How To Create A DIY Home Decor On A Budget
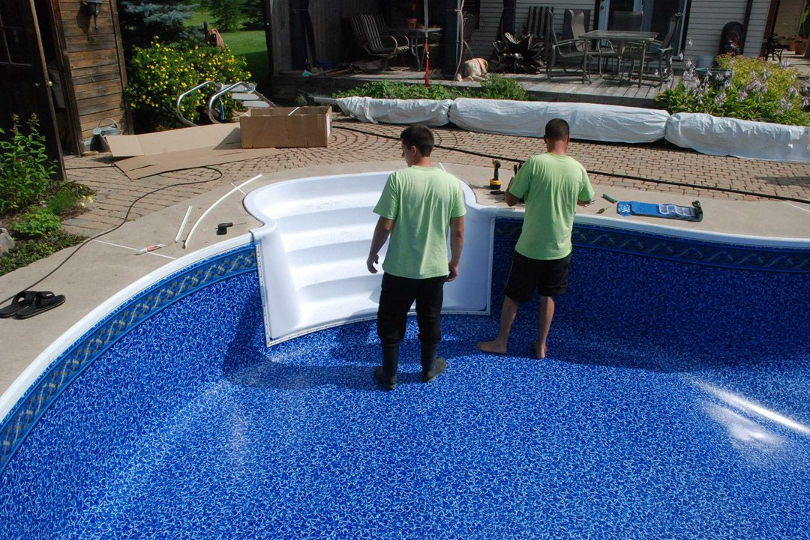
Step 7: Apply New Surface Material
Mix the pool resurfacing material according to the manufacturer’s instructions. Apply the material using trowels or plastering tools, working in small sections to ensure a smooth and even finish. Pay attention to the thickness of the application as recommended by the product.
Step 8: Smooth and Finish
After applying the new surface, use trowels to smooth and finish the surface. Take your time to achieve a uniform and aesthetically pleasing result. Allow the material to set according to the manufacturer’s recommendations.
Read Also: How To Create A DIY Home Renovation Plan
Step 9: Fill the Pool
Once the resurfacing material has cured, refill the pool with water. Follow any specific instructions provided by the resurfacing material manufacturer regarding water filling and curing times.
Step 10: Adjust Water Chemistry
Test and balance the water chemistry in the pool according to the manufacturer’s recommendations. This is crucial for the longevity of the new surface material.
Read Also: How To Get Paint Off Vinyl Floors (The Ultimate Guide)
Step 11: Final Touches (Optional)
If desired, you can apply pool paint or an additional pool finish for added durability, aesthetics, or texture. Follow the manufacturer’s guidelines for application and curing.
Step 12: Regular Maintenance
Implement a routine maintenance schedule for your newly resurfaced pool to ensure its longevity and optimal condition.
Read Also: How To Paint A Portrait With Acrylics(Step By Step)
Conclusion
Recall that a properly resurfaced pool not only provides a revitalised aesthetic appeal but also adds to the the durability and safety of your investment. It turns into a place where people find leisure, create memories, and completely experience the delight of life in the water.
Thus, when you set out on this resurfacing journey, rejoice in the chance to revitalise your pool and create a long-lasting aquatic sanctuary that will provide you delight for years to come. Let’s toast to your pool’s revival and the innumerable peaceful and leisurely times it will bring.
FAQs & Answers
1. How often should I think about having my pool resurfaced?
The type of surface, usage, and climate all affect how often a pool needs to be resurfaced. Generally, it’s recommended to replace it every ten to fifteen years, but be sure to keep a close eye out for wear and damage.
2. What are the telltale symptoms that my pool requires a resurface?
Common indicators include cracks, peeling or flaking surfaces, rough textures, and stains that don’t go away. It is advisable to think about resurfacing if you observe any of these symptoms.
3. When my pool is resurfaced, can I use it right away?
Waiting until the curing process is finished is advised. Depending on the resurfacing material, this process usually takes 7–14 days. Pay attention to the advice that your pool contractor gives you.