How to transfer photos from iPhone to external hard drive (The Ultimate Guide): In today’s digital era, our smartphones act as treasure troves for the priceless moments we capture through our camera lenses. Yet, over time, our iPhone storage can become overwhelmed, leaving us in a frenzy for space.
Read Also: How to make a text file on Mac(Quick and Easy)
What’s the solution to this? Migrating photos to an external hard drive. This all-encompassing manual will guide you through each step, guaranteeing the secure storage and effortless access of your cherished memories.”
Read Also: How to convert video to mp3 on iPhone (All you need to know)
Have you even asked yourself Why you should transfer photos to an external hard drive?
Transferring photos to an external hard drive has various advantages. It frees up crucial space on your iPhone, resulting in smoother performance. External hard drives also have a large storage capacity, allowing you to keep all of your memories secure and organized in one place. Furthermore, backing up images to an external hard drive protects against data loss as a result of device damage or failure.
Read Also: How To Transfer WhatsApp Messages From Android To iPhone
The Ultimate Guide on How to transfer photos from iPhone to external hard drive
1. Selecting the Right External Hard Drive
Read Also: How to change your AirDrop settings on an iPhone or iPad(The Ultimate Guide)
2. Prepare Your iPhone for Transfer
Read Also: How to stop the screen turning off on a Mac (All you need to know)
3. Using A Computer to Transfer Photos
Connect your iPhone to your PC via USB cord. To pick and transfer photographs to an external hard drive, either the photos app or Image Capture (on macOS). Follow the on-screen instructions to complete the transfer process quickly.
Read Also: How to Check Your Apple Account Balance(2024 Guide)
4. Using Third-Party Applications
Read Also: How to Disconnect iPad from iPhone (Ultimate Guide 2023)
Conclusion
Finally, using the information provided in this comprehensive guide, you now have the knowledge and tools needed to transfer images from your iPhone to an external hard drive. Accept this transfer process as a way of conserving the most important events for future generations.
FAQs & Answers
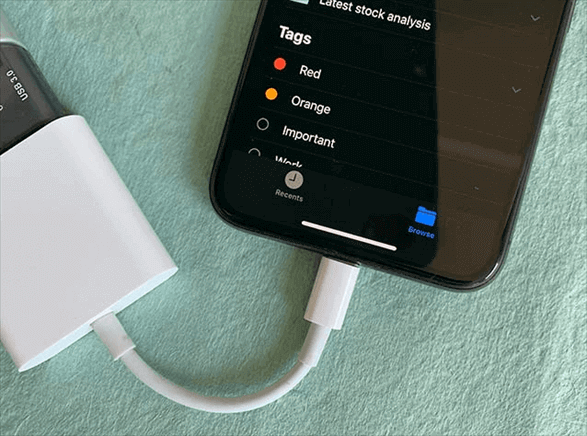
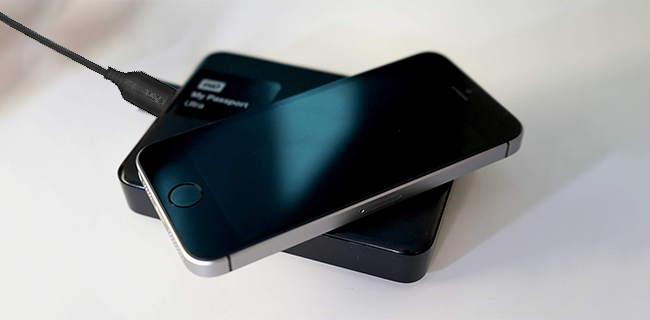
1. Can I transfer images directly from my iPhone to an external hard drive without using a computer?
Yes, you can use Lightning to USB converters or specialized external hard drives with Lightning ports to transfer images from your iPhone to the external drive.
2. Which file format should I use when transferring images to ensure compatibility?
JPEG is the most extensively used file format for photographs. If you need higher quality or editing capabilities, consider using formats such as HEIF (High-Efficiency Image Format) or RAW.
3. How can I keep my photos organized during the transfer process?
Create folders or albums on your external hard drive to replicate the iPhone’s organizational structure. This allows for quick navigation and retrieval of photos.