How To Make A Compost Bin: Composting is an excellent way to reduce waste and create nutrient-rich soil for your garden. By making your own compost bin, you can easily recycle kitchen scraps and other organic waste into useful compost. Making your own compost is something that anyone, whether a novice gardener or a seasoned master, can accomplish. EnoughInfo.com
Read Also: How To Tell Your Lawn Needs Lime
It’s an excellent method for recycling yard debris such as grass clippings and dry leaves, as well as vegetable peelings and other kitchen scraps. When spread around plants or mixed into the soil, the nutrient-rich blend of decomposed organic components works wonders. But first, you’ll need a compost bin. One of the simplest DIY compost bin projects is to start with a garbage can (which you may already have) and drill multiple holes in it so your compost can get lots of air and break down quickly. Then, place your new bin in a convenient location and begin adding organic material to it. How To Knit A Scarf (For Beginners)
FAQs & Answers on How To Make A Compost Bin
1. Can I use a different material for constructing the compost bin?
Yes, you can use various materials depending on your preference and availability. Besides wooden pallets and wire mesh, you can use cinder blocks, bricks, or even repurposed containers like old barrels or trash cans. Just ensure that the chosen material allows for proper airflow and drainage.
2. How long does it take for compost to be ready?
The time required for compost to fully mature can vary depending on several factors, including the materials used, the size of the bin, and the environmental conditions. Generally, it takes between 3 to 6 months for compost to be ready for use. Regularly turning the compost and maintaining the right balance of moisture and aeration can speed up the process.
3. What can I add to my compost bin?
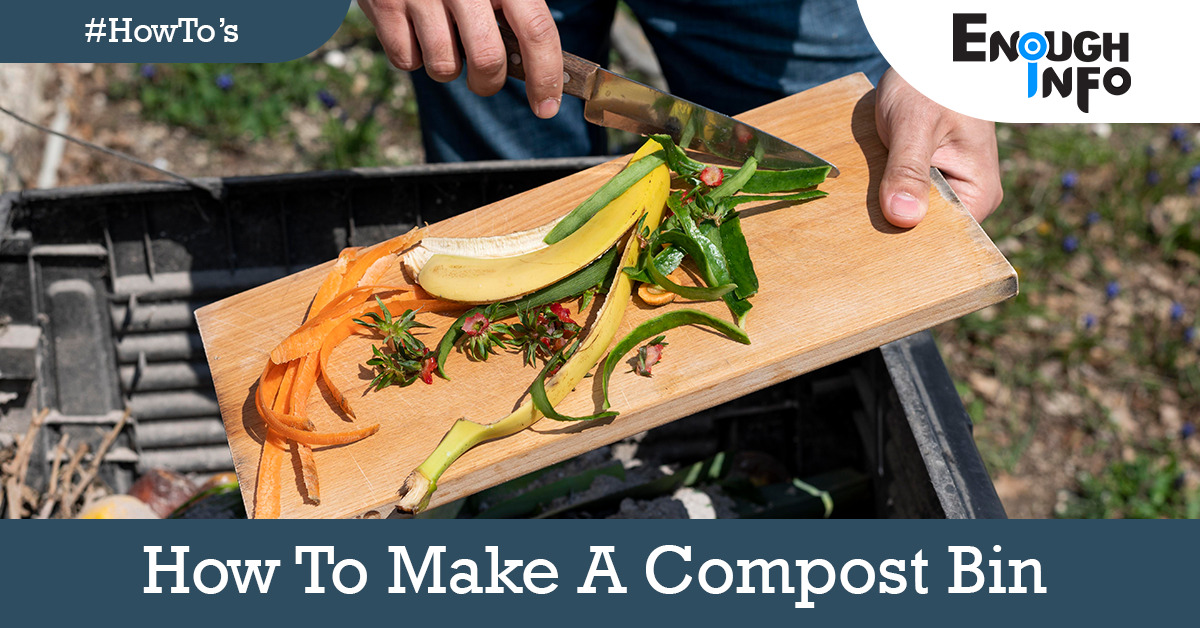
You can add a variety of organic materials to your compost bin, including fruit and vegetable scraps, coffee grounds, tea leaves, yard waste (such as leaves, grass clippings, and small branches), shredded newspaper, and cardboard. Avoid adding meat, dairy products, oily materials, and diseased plants, as they can attract pests or introduce pathogens to the compost.
4. Why is it important to balance browns and greens in composting?
Balancing browns (carbon-rich materials) and greens (nitrogen-rich materials) in composting is essential for optimal decomposition and nutrient breakdown. Browns provide carbon for energy, while greens provide nitrogen for microbial activity. The right balance creates an ideal environment for beneficial organisms to break down the organic matter into nutrient-rich compost.
Read Also: How To Grow Herbs Indoors
5. How often should I turn the compost?
Turning the compost helps aerate the pile, speed up decomposition, and prevent odors. Depending on the conditions and the size of your bin, you should aim to turn the compost every 2 to 4 weeks. However, if you notice excessive dryness or a foul smell, you may need to turn it more frequently. How To Create A Podcast (All you need to Know)
6. Can I add weeds to my compost bin?
You can add weeds to your compost bin, but it’s important to handle them properly. To prevent weed seeds from spreading, it’s recommended to avoid adding weeds that have gone to seed. Additionally, if the weeds have persistent roots or rhizomes, it’s advisable to avoid including them, as they may regrow in your compost.
How to Make a Compost Bin: A Beginner’s Guide to Sustainable Gardening
In this beginner’s guide, we’ll take you through the step-by-step process of creating a compost bin to kick-start your sustainable gardening journey.
Materials Needed:
- Wooden pallets or wire mesh
- Hammer and nails or zip ties
- Gardening gloves
- Wire cutters (if using wire mesh)
- Shovel or pitchfork
- Water source
Step 1: Choose a Location:
Select a suitable spot for your compost bin. Ideally, it should be in a shaded area to prevent excessive drying out of the compost. Ensure that the location is easily accessible for adding materials and turning the compost.
Read Also: How to start a vegetable garden
Step 2: Determine the Size:
Decide on the size of your compost bin based on the amount of organic waste you generate and the available space. A compost bin with dimensions of around 3 feet wide, 3 feet deep, and 3 feet high is a good starting point.
Step 3: Construct the Bin:
Option 1: Using Wooden Pallets If using wooden pallets, arrange three pallets upright to form the back and sides of the bin. Secure them together by nailing or zip-tying the corners. Use an additional pallet to create a hinged front panel that allows easy access for turning and retrieving compost. How To Make Cold Brew Coffee (Step by step)
Option 2: Using Wire Mesh If using wire mesh, cut the mesh to the desired size and shape using wire cutters. Form the mesh into a cylinder or square shape and secure the ends by bending or using wire ties.
Step 4: Prepare the Base:
Ensure good drainage by laying down a layer of twigs, small branches, or straw at the bottom of the bin. This helps with aeration and prevents the compost from becoming waterlogged.
Step 5: Add Composting Materials:
Start by adding a layer of brown materials such as dry leaves, straw, or shredded newspaper. Follow this with a layer of green materials such as fruit and vegetable scraps, coffee grounds, or grass clippings. Alternate these layers, ensuring a good mix of carbon-rich (browns) and nitrogen-rich (greens) materials. Keep in mind to avoid adding meat, dairy products, or oily materials.
Read Also: How to plant tomatoes in pots(The Ultimate Guide)
Step 6: Maintain the Compost:
Regularly add organic waste to the compost bin, ensuring a good balance between browns and greens. Keep the compost moist by watering it periodically, especially during dry periods. Every few weeks, use a shovel or pitchfork to turn the compost, mixing the materials and promoting aeration. How To Paint A Watercolor Landscape
Step 7: Harvest the Compost:
After a few months, the compost will transform into dark, crumbly, and earthy-smelling soil. It’s time to harvest your compost! Remove any remaining larger materials and use the compost in your garden beds, pots, or as a nutrient-rich top dressing for existing plants.
WHEN WILL YOUR COMPOST BE AVAILABLE FOR USE?
The amount of time required is determined by the size of your bin and how recently you introduced new organic waste. It could take a few months or up to a year to complete. The following are some significant indicators that it is ready for use in your lawn or garden:
- All of your biodegradable items have decomposed (there is no visible food in its original form).
- It smells “earthy” or “dirty” (rather than acidic or sour). How To Remove Stains From Clothes
- It’s no longer generating heat (it should be roughly the same temperature as the surrounding air).
- It’s black and crumbly, rather than wet or clumpy.
Once finished, your compost can be used as mulch, potting soil, or sprayed over grass as a lawn conditioner. Remember to save at least one-third of it to help the composting process. You may also want to make a second bin to which you may add your food wastes while your first bin decomposes to completed compost.
Read Also: Health Benefits Of Turmeric
Tips & Tricks for Composting
It’s critical to feed your compost pile with the correct materials and encourage it to break down, especially if you’re just getting started. Use the following tips to get your compost going and provide the best nutrients for your garden:
- Composting is classified into two types: hot and cold. Hot composting “fast-cooks” the materials by combining nitrogen, carbon, air, and water to produce compost in a matter of months. Cold composting entails simply gathering things in a bin and allowing them to degrade naturally over the period of a year.
- Good compost begins with good materials. Compostable materials include fruit and vegetable scraps, eggshells, coffee grounds, grass clippings, dried leaves, finely chopped wood, shredded paper, straw, and sawdust from untreated wood.
- Bad materials can ruin your compost pile and, ultimately, your garden. Composting sick plant parts, treated wood, animal feces, weeds that go to seed, or anything containing meat, oil, fat, dairy, or grease is not recommended.
You’ll be able to start using your compost in your garden in no time. Compost can assist enrich soil when establishing a new garden bed, but it can also be applied in a thick layer in an existing garden to replenish nutrients. If you start feeding your garden with homemade compost, it will reward you with bounty.
Read Also: How To Dispose Of Helium Tank(2023)
Conclusion
Creating your own compost bin is a simple and effective way to recycle organic waste while enriching your garden soil. By following these steps, you can establish a sustainable composting system and contribute to a greener environment. Remember to be patient, maintain the right balance of materials, and enjoy the process of creating nutrient-rich compost for your plants. Happy composting!