How to fix a leaky faucet(The Ultimate Guide)

How to fix a leaky faucet – A leaky tap can be an inconvenient and wasteful problem that not only raises your water bill but also wastes water. Fortunately, repairing a leaky tap is a straightforward procedure that you can complete on your own with a few basic tools.

In this post, we will walk you through the process of repairing a leaky tap, as well as provide answers to frequently asked questions to help you troubleshoot any problems that may emerge.
Read Also: How To Treat A Burn At Home (All you Need to Know)
Step-by-Step Instructions for Repairing a Leaky Faucet:
1. Before you begin, gather the following tools:
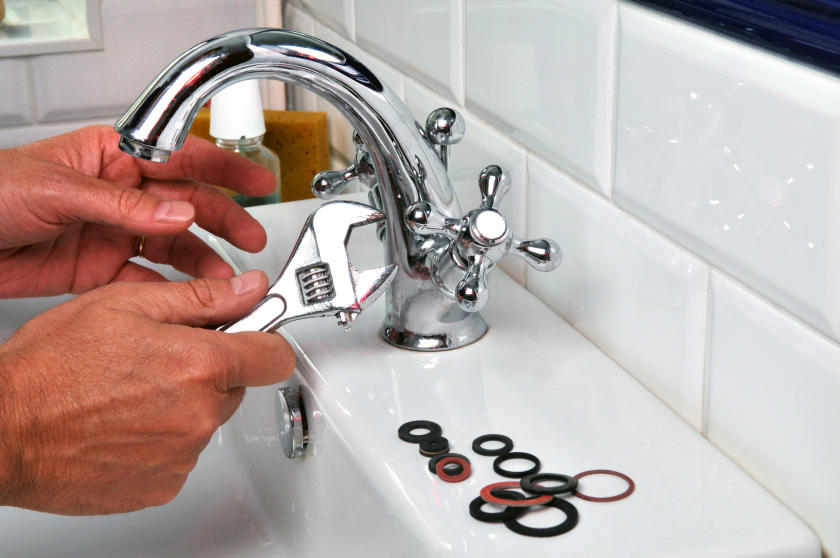
an adjustable wrench, screwdrivers (both flathead and Phillips), replacement parts (such as washers or O-rings), and plumber’s tape (Teflon tape).
2. Crank Off the Water:
Locate the water shut-off valves beneath the sink and crank them clockwise to cut off the water flow to the tap. If there are no individual shut-off valves, cut off the house’s main water supply.
3. Disassemble the Faucet:
Depending on the type of faucet, remove the handle with a screwdriver or an adjustable wrench to reveal the cartridge or valve within. Some faucets have a decorative cap that covers the screw and can be gently peeled off. How to Write a Resume (The Ultimate Guide)
Read Also: How To Be A Good Father (The Ultimate Guide)
4. Determine the Issue:
Examine the cartridge or valve for evidence of wear, corrosion, or damaged seals. Leaks are commonly caused by worn-out washers, O-rings, or malfunctioning cartridges. Determine the specific part that needs replacement.
5. Replace the Faulty Parts:
Replace the old washer, O-ring, or cartridge with a new one. Make sure you have the right replacement parts for your tap model. Tape the threads of any connections that need to be sealed with the plumber’s tape.
6. Reassemble and test:
Carefully reassemble the tap in the opposite order that it was disassembled. Check that all parts fit tightly and that any screws or connections are properly tightened. Check for leaks by turning on the water supply. If the leak persists, repeat the procedure or seek expert help. enough info
Read Also: How to lose weight without exercise(The Ultimate Guide)
FAQs and Answers: on How to fix a leaky faucet
1, Why is my tap still leaking after the washers were replaced?
If your tap still leaks after you replace the washers, the problem could be with another component, such as the O-rings or cartridges. Inspect these components for damage or wear and replace them as needed. How to draw a cat step by step(All You Need To Know)
2, Can I repair a leaking tap without turning off the water?
To minimize potential flooding or mishaps, it is strongly advised to turn off the water supply before undertaking any repairs. A safe working environment is ensured by turning off the water supply.
What should I do if I come across a clogged or rusted tap handle?
Apply penetrating oil to the connection and let it sit for a few minutes if the tap handle is stuck or corroded. To loosen the handle, use a wrench or pliers with a cloth to offer extra grip and slowly turn it.
Read Also: How To Look Fresh (The Ultimate Guide)
3, Should I employ a plumber to repair a leaking tap?
Repairing a leaky tap is generally considered a do-it-yourself project that can be completed with minimal tools and some patience. If you are unclear about the process or run into intricate problems, it is best to see a professional plumber. How to fix a leaky faucet
4, what can I do to avoid further tap leaks?
Inspect your faucets on a regular basis for signs of wear or leaks, and solve any concerns as soon as possible. Additionally, when using the tap, avoid overtightening the handles, since this might cause damage over time. How to organize your closet(Step by Step)
Read Also: How to clean a laptop screen(A Step-by-Step Guide)
Conclusion:
Repairing a leaky faucet is a simple procedure that can save you money, conserve water resources, and restore your faucet’s functionality. You may confidently tackle this repair project on your own by following the step-by-step guide and answering typical questions. Remember to gather the required equipment, switch off the water supply, diagnose the problem, replace broken parts, and reinstall the tap. How to plant tomatoes in Pots (The Ultimate Guide)
If problems persist or you are unsure about the process, don’t be afraid to seek professional help. You may effectively repair a leaky tap and enjoy the benefits of a fully functional, drip-free fixture while promoting water conservation in your house with little effort.


