How To Make A Paper Boat
How to make a paper boat – Remember those childhood days when you would fold a simple piece of paper into a boat and set it sailing on a puddle or stream? Making a paper boat is a delightful craft that brings out the child in all of us.
Do you want to learn how to create a floatable paper boat? It is simple, and you will be able to play with your children while bathing them or walking with them at the park. A sheet of A4 paper is all that is required to learn how to create a paper boat.
In this article, we will guide you through the process of creating a classic paper boat step by step, providing a fun activity for all ages.
Read Also: How To Crochet A Granny Square
Materials Needed:
- A rectangular sheet of paper (8.5 x 11 inches or A4 size)
- Scissors (optional)
- Markers or crayons (optional, for decorating)
What type of paper is required to create a paper boat?
Because most individuals already have printer paper or construction paper at home, I find it easier to use that. To add color to your boat, you can color or draw on white paper, which comes in a variety of interesting colors.
If you have origami paper, you may also use it. Because most origami paper is square, you only need to cut it to ensure the proportions are correct.
Is it possible to put items in paper boats?
In a way. If you intend to use your boats in water, everything you put in them must be extremely light, or the boats will tip over. You may make paper people or teeny small toys to put in your boats. But I can’t guarantee that the boats will stay upright in the water while loaded with toys.
If you play with the boats on the floor (rather than in the water), you may fill them with all kinds of fascinating, little toys.
A Step-by-Step Guide To Making A Paper Boat
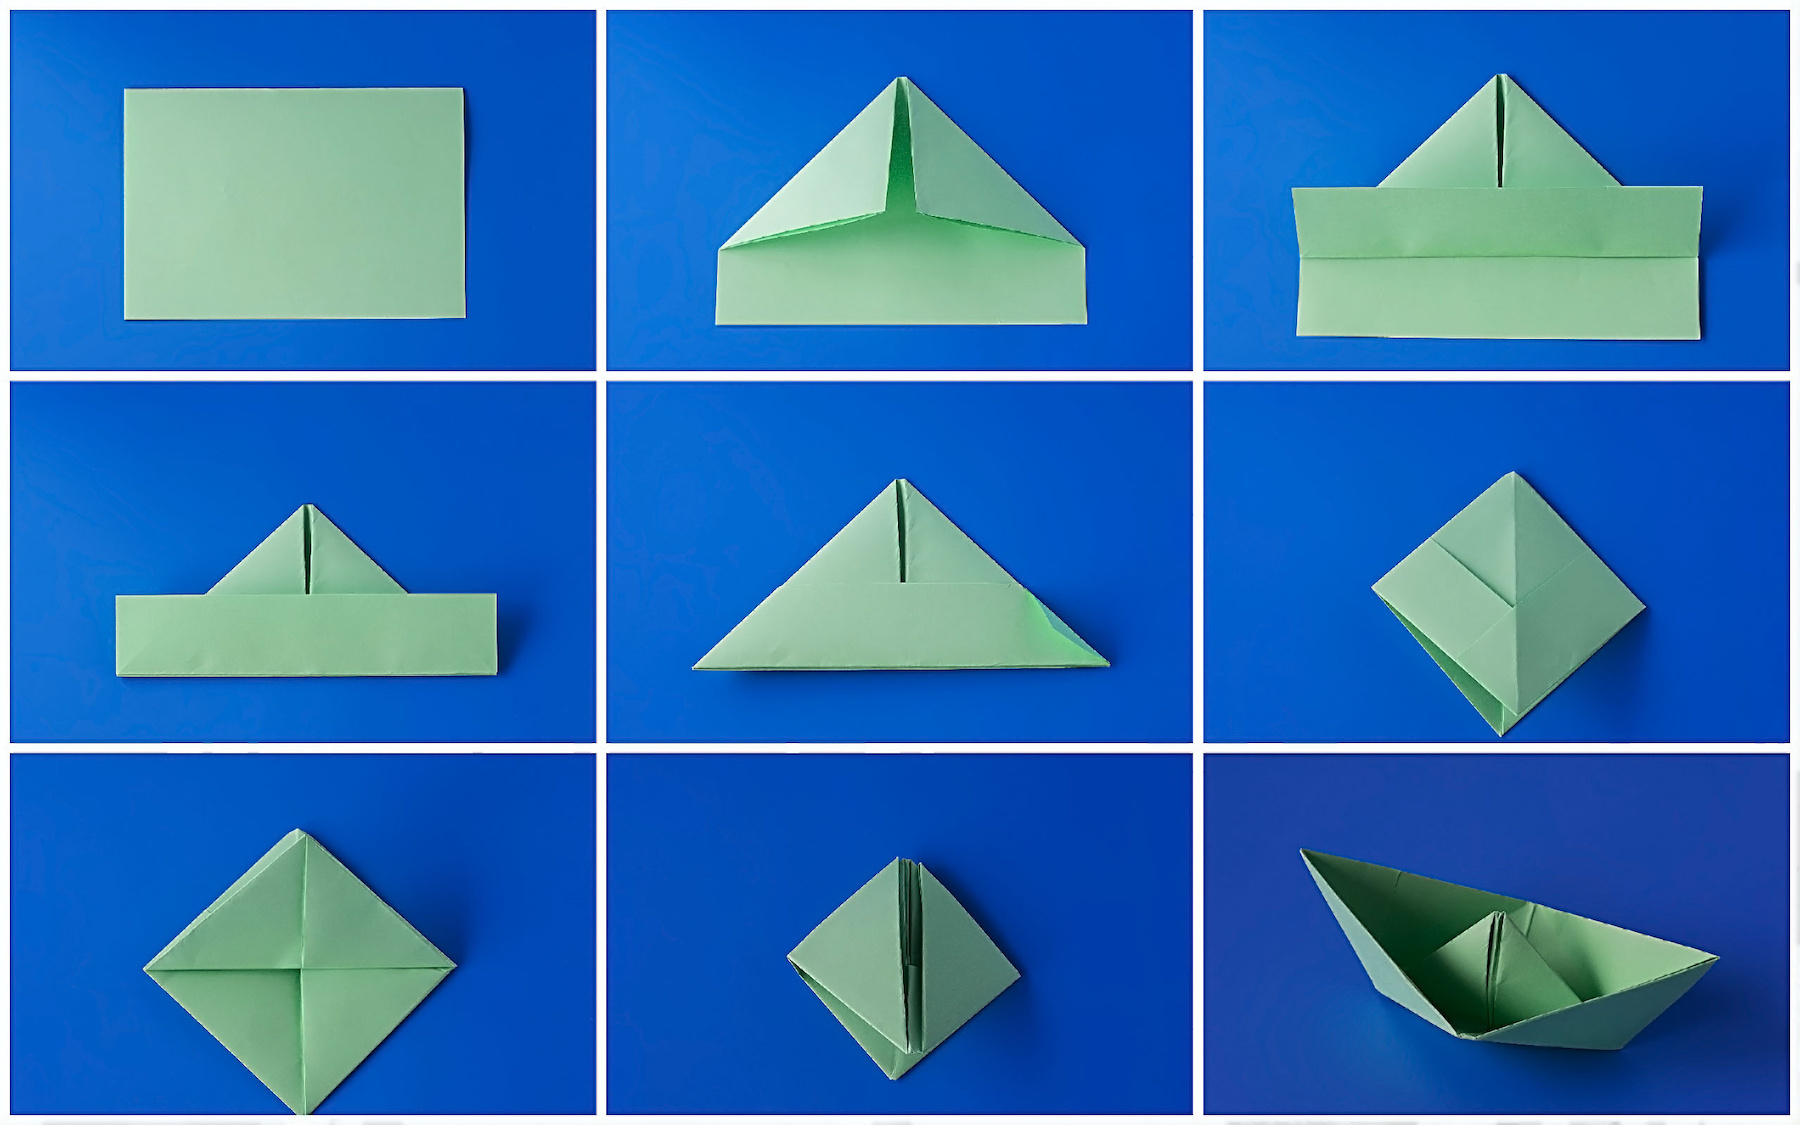
Step 1: Start with a Rectangular Sheet of Paper
Begin by selecting a rectangular sheet of paper. You can use standard printer paper, colored paper, or even recycled paper. Ensure that the paper is free of creases or tears for the best results.
Step 2: Fold the Paper in Half
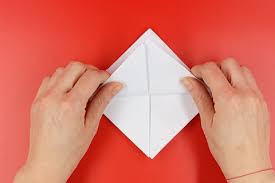
Take one corner of the paper and fold it diagonally to the opposite corner, creating a triangle. Press firmly along the folded edge to make a crisp crease. Unfold the paper, and you should now have a diagonal crease running through the center.
Step 3: Fold the Bottom Corners
With the paper lying flat on the table, fold the bottom left and right corners towards the center along the crease line. The folded edges should meet at the centerline, forming a smaller triangle at the bottom.
Read Also: How AI and Nanotechnology Work Together
Step 4: Fold the Bottom Flap
Flip the paper over to the other side. Take the bottom edge of the paper and fold it up towards the top, aligning it with the bottom edge of the triangle created in the previous step. This fold will form a pocket that will become the base of the boat.enough info
Step 5: Create the Boat Shape
Hold the paper at the top corners and gently pull them apart. As you do this, the sides of the paper will fold inward along the existing creases, forming a diamond shape. Flatten the diamond shape by pressing down on the sides.
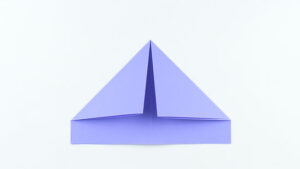
Step 6: Fold the Side Flaps
Take the left and right corners of the diamond shape and fold them towards the center, aligning the edges with the centerline. These folds will create triangular flaps on both sides of the diamond.
Step 7: Extend the Boat Hull: Lift up the triangular flaps created in the previous step. Carefully pull them apart and fold them downward, extending the boat’s hull. This step gives your paper boat a more defined shape.
Optional Step: Decorate Your Boat
If you want to add a personal touch to your paper boat, now is the time to get creative. Use markers or crayons to draw windows, flags, or other designs on the sail and hull. Let your imagination run wild and bring your boat to life with vibrant colors.
Step 8: Final Touches and Launch
Smooth out any creases and ensure that all folds are secure. Gently hold the boat by the sides, place it in a container of water, and watch it set sail. If the boat tends to tip over, you can slightly adjust the folds to improve its balance.
Read Also: How To Paint A Sunset With Acrylics(The Ultimate Guide)
FAQs & Answers
1, Can I use any type of paper to make a paper boat?
Yes, you can use various types of paper to make a paper boat. Standard printer paper, colored paper, and even recycled paper can be used. Just ensure that the paper is rectangular in shape and not too thick, as it may be harder to fold.
2, Can I decorate my paper boat?
Absolutely! Decorating your paper boat is a fun way to personalize it. You can use markers, crayons, or colored pencils to add designs, windows, flags, or any other creative elements you desire. Let your imagination soar!
3, Can I make a larger or smaller paper boat?
Yes, you can adjust the size of your paper boat by using a larger or smaller sheet of paper. Just make sure the paper is rectangular and maintain the same proportions when folding and creating the boat. Experimenting with different sizes can be a fun way to explore variations in your paper boat creations.How to make a paper boat
4, Can I fold a paper boat without scissors?
Absolutely! Scissors are optional for making a basic paper boat. However, if you want to customize your boat by cutting out shapes or making design modifications, you may find scissors helpful. Remember to exercise caution while using scissors and ensure they are handled safely, especially when involving children.
Read Also: How To Get Nether Wart In Minecraft
5, How can I make my paper boat more water-resistant?
While paper boats are not designed to be waterproof, you can increase their water resistance by using wax paper or coating them with clear waterproof sealants or sprays. Keep in mind that these additional steps may affect the folding and sailing properties of the boat, so it’s essential to experiment and find the right balance.
6, Can I use my paper boat in a bathtub or pool?
Yes, you can use your paper boat in a controlled water environment such as a bathtub or a shallow pool. However, remember that paper can easily get wet and lose its shape or durability. Ensure that the water level is not too high, and be prepared for the paper boat to potentially become soggy or disintegrate over time.
7, How long will a paper boat float?
The longevity of a paper boat’s floatability depends on various factors, including the quality of the paper, water conditions, and handling. While some paper boats may stay afloat for a short time, others may last longer. Enjoy the sailing experience while it lasts, and if your boat becomes waterlogged or sinks, it’s an opportunity to make a new one and continue the fun!
8, Can I reuse a paper boat?
Reusing a paper boat may be challenging as the paper can become weakened or damaged after being in contact with water. It’s best to view each paper boat as a temporary creation and enjoy the process of making new ones. However, you can always document your boat creations through photos or drawings to cherish the memories.
Read Also: SpaceX Starship, World’s Biggest Rocket, Ready For First Test Flight
Conclusion:
Making a paper boat is a delightful activity that can be enjoyed by people of all ages. Whether you’re looking for a rainy-day craft or a fun activity with kids, this simple folding technique will create a charming little boat that’s ready to set sail. So grab a sheet of paper, follow the steps outlined above, and let your imagination float away with your handmade paper boat.

