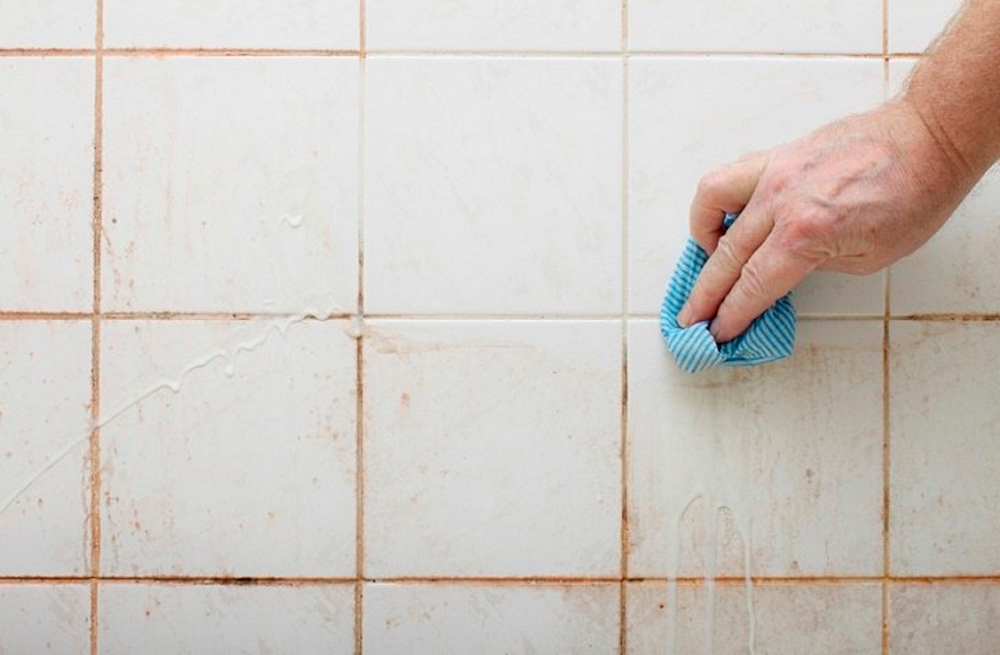
How to clean grout between tiles – Grout is the material that fills the gaps between tiles, serving both a functional and aesthetic purpose. Over time, grout can accumulate dirt, stains, and mold, which can diminish the appearance of your tiled surfaces. Cleaning grout is an essential part of maintaining the beauty and hygiene of your tiled areas. Cleaning the grout between tiles requires a systematic approach to ensure thorough and effective results. In this step-by-step guide, we will walk you through the process of cleaning grout, from testing cleaning solutions to scrubbing the grout and rinsing the surface.enoughinfo
Maintaining clean grout between tiles is essential for both practical and aesthetic reasons. It ensures a healthier living environment, preserves the beauty and longevity of your tiled surfaces, and contributes to the overall value of your property. By incorporating grout cleaning into your regular cleaning routine, you can enjoy sparkling and well-maintained tiled spaces for years to come.
Read Also: How to Clean Stainless Steel Appliances
Ultimate Guide: How to Clean Grout Between Tiles For Sparkling Results
Follow these steps to achieve sparkling grout and restore the beauty of your tiled surfaces.
Step 1: Test Cleaning Solutions
Before applying any cleaning solution to the entire grout area, it’s important to test it in a small, inconspicuous area. This allows you to check for any adverse reactions or discoloration. Choose a small section of grout, apply the cleaning solution, and let it sit for a few minutes. Rinse it off and inspect the results. If there are no negative effects, you can proceed with the cleaning process.
Step 2: Surface Preparation
Start by removing loose dirt, debris, and surface grime from the tiles and grout. You can use a broom, vacuum cleaner, or a soft brush to sweep away loose particles. This step helps prevent dirt from being pushed into the grout during the cleaning process.
Step 3: Applying the Cleaning Solution
There are several effective cleaning solutions for grout, including natural options like baking soda and vinegar or hydrogen peroxide and baking soda. Choose the solution that suits your preference and the severity of the grout stains. Prepare the cleaning solution according to the instructions and apply it directly to the grout lines.
You can use a spray bottle, a sponge, or a grout brush to apply the solution. Ensure that the grout lines are saturated with the cleaning solution, allowing it to penetrate and loosen the dirt and stains.
Step 4: Scrubbing the Grout
After applying the cleaning solution, it’s time to scrub the grout to remove the dirt and stains. Depending on the severity of the grime, you can use a grout brush, an old toothbrush, or a scrubbing pad. Scrub the grout lines vigorously but avoid applying excessive pressure that could damage the grout or tiles.
Focus on one small section at a time, working in a back-and-forth or circular motion. Pay extra attention to heavily stained areas, and continue scrubbing until the grout appears clean and renewed.
Read Also: How To Clean Hardwood Floors Naturally
Step 5: Rinsing and Drying
Once you have scrubbed the grout lines, it’s crucial to thoroughly rinse the surface to remove any residue from the cleaning solution. Use a clean sponge or a damp cloth to wipe away the solution from the tiles and grout. Rinse the sponge or cloth frequently to ensure effective removal of the cleaning solution.
After rinsing, allow the grout to dry completely. This may take some time, so ensure good ventilation in the room to speed up the drying process. Avoid stepping on the wet grout to prevent any potential damage.
Optional Step: Sealing the Grout
If your grout is porous and prone to staining, it’s advisable to seal it after cleaning and drying. Grout sealer creates a protective barrier that helps prevent dirt, stains, and moisture from penetrating the grout. Follow the manufacturer’s instructions for the specific grout sealer you’re using, and apply it evenly to the grout lines. Allow sufficient drying time before exposing the grout to moisture.
Regular Maintenance
To keep your grout looking clean and fresh, incorporate regular maintenance into your cleaning routine. Sweep or vacuum the tiled area regularly to prevent dirt and debris buildup. Wipe spills immediately to avoid staining the grout. Additionally, consider using a mild, pH-neutral cleaner on a regular basis to keep the grout looking its best.
Read Also: How to clean a microwave(The Ultimate Guide )
By following these step-by-step instructions and incorporating regular maintenance, you can effectively clean grout between tiles and maintain its cleanliness and appearance over time. Remember, consistency and proper technique are key to achieving optimal results. Here are a few additional tips to keep in mind:
- Avoid using harsh or abrasive cleaners that can damage the grout or tiles. Stick to mild cleaning solutions and gentle scrubbing techniques.
- If the grout stains are particularly stubborn, you may need to repeat the cleaning process or try alternative cleaning methods. Be patient and persistent in your efforts.
- For vertical surfaces or hard-to-reach areas, consider using a spray bottle to apply the cleaning solution or invest in a grout cleaning tool with a brush attachment for easier scrubbing.
- Protect yourself by wearing gloves and ensuring proper ventilation while working with cleaning solutions.
- Avoid using excessive water or allowing it to sit on the grout for extended periods, as it can seep into the grout and cause damage or promote mold growth.
- When sealing the grout, follow the manufacturer’s instructions carefully and apply the sealer evenly. Consider resealing the grout every 6 to 12 months to maintain its protective barrier.
- If you have colored grout, test any cleaning solution or sealer on a small, inconspicuous area first to ensure it doesn’t cause discoloration.
- In areas prone to high moisture, such as bathrooms or kitchens, consider using a mold and mildew-resistant grout or applying a mold inhibitor after cleaning to prevent mold growth.
- Lastly, if you’re unsure or uncomfortable with cleaning grout yourself, consider hiring a professional grout cleaning service to ensure the best results and to avoid any potential damage to your tiles or grout.How to clean grout between tiles
Some Basic Steps Of Cleaning Grout Between Tiles
Cleaning grout between tiles can be a straightforward process if you follow some basic steps. Here is a basic guide to cleaning grout between tiles:
Gather Your Supplies: Before you begin, gather the necessary supplies. You will need a grout cleaner (either commercial or homemade), a scrub brush (toothbrush-sized or larger), a bucket of water, and a clean cloth or sponge.
Preparing the Area: Clear the area around the tiles and remove any loose dirt or debris. This can be done by sweeping or vacuuming the floor or wiping down the wall tiles.
Apply the Grout Cleaner: Apply the grout cleaner to the grout lines. You can use a spray bottle, a brush, or a sponge to apply the cleaner. Make sure the grout lines are thoroughly saturated with the cleaner, allowing it to penetrate and loosen the dirt and stains.
Let the Cleaner Sit: Give the grout cleaner some time to work. Read the instructions on the cleaner’s label to determine the recommended amount of time for it to sit on the grout. This will allow the cleaner to break down the dirt and stains for easier removal.
Read Also: How to clean silver jewelry at home
Scrub the Grout: Once the cleaner has had time to work, use the scrub brush to scrub the grout lines. Apply firm pressure and use a back-and-forth or circular motion to loosen the dirt and stains. Focus on one small section at a time to ensure thorough cleaning.
Rinse the Grout: After scrubbing the grout lines, rinse the area with clean water. You can use a clean cloth or sponge soaked in water to wipe away the cleaner from the grout lines and tiles. Rinse the cloth or sponge frequently to remove any residue.
Dry the Surface: Use a clean, dry cloth or towel to dry the grout lines and tiles. Make sure the area is completely dry to prevent any moisture from seeping back into the grout and causing mold or mildew growth.
Repeat if Necessary: For stubborn stains or heavily soiled grout, you may need to repeat the cleaning process. Apply the cleaner again, let it sit, scrub, rinse, and dry until the desired results are achieved.
Sealing (Optional): After the grout is clean and dry, you may consider applying a grout sealer to protect it from future stains and dirt. Follow the manufacturer’s instructions for the specific sealer you are using.
By following these basic steps, you can effectively clean the grout between your tiles. Remember to always test any cleaner on a small, inconspicuous area first and follow the manufacturer’s instructions for both the cleaner and any optional sealing products. Regular maintenance and cleaning will help keep your grout looking clean and prolong its lifespan.
Read Also: How to clean a laptop screen(A Step-by-Step Guide)
Conclusion:
Cleaning grout between tiles is an essential task to maintain the cleanliness and beauty of your tiled surfaces. By following this step-by-step guide and incorporating regular maintenance, you can effectively clean grout and restore its original luster. Remember to test cleaning solutions, prepare the surface, apply the solution, scrub the grout, rinse thoroughly, and allow for proper drying. Optional steps such as sealing the grout can further enhance its durability and resistance to stains. With patience, diligence, and the right techniques, you can achieve sparkling grout and enjoy the fresh and rejuvenated look of your tiled spaces.