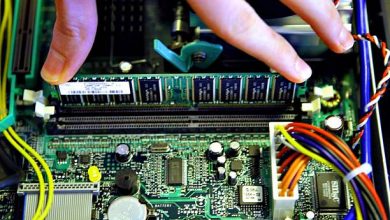
How To Test A Capacitor With A Multimeter: Is your HVAC system shutting down unexpectedly? Have you ever noticed your washing machine making a loud buzzing sound or your laptop unexpectedly restarting? These many issues are caused by a defective capacitor. Capacitors come in a variety of forms and sizes and are used for a variety of functions, the most frequent of which is to regulate the flow of power supply to other components within a circuit.
FAQs & Answers
1, How Can You Tell If A Capacitor Is Faulty?
You may readily detect problems in a capacitor by physically analyzing it for bulges or using a multimeter to see whether it has the proper resistance, capacitance, and/or voltage. Enough Info
2, How Many Ohms Should a Capacitor Have?
Depending on the model, a capacitor is estimated to contain tens or hundreds of thousands of Ohms. To be confident of what to check for, read up on the specs of your capacitor model on the internet.
Read Also: How To Find Motivation To Achieve Your Goal
3, Should a capacitor have continuity?
It is a passive electrical component with two terminals. The effect of a capacitor is described by the word capacitance. Yes, the capacitor should be operational. The capacitor is considered to have continuity when it is closed. How To Trick A Mass Air Flow Sensor(2023Tips)
Given its significance, we will demonstrate how to test a capacitor using only a multimeter in this post.
Let’s get started.
Tools Required for Capacitor Testing
To thoroughly test a capacitor, you will need:
- Digital Multimeter
- 9-volt battery (power source)
- Jumper wires
- Soldering iron
- Protective wear
How To Test A Capacitor With A Multimeter
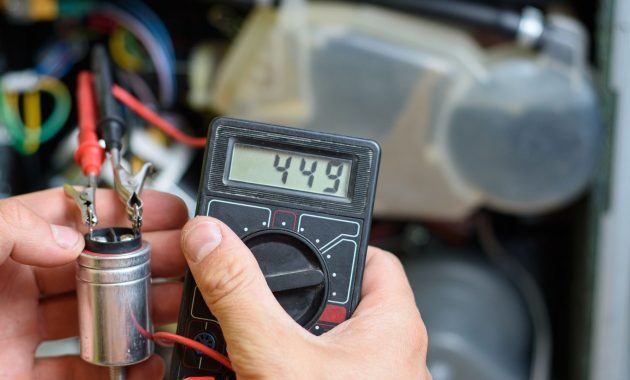
To test a capacitor, set the multimeter to 20k or 2m Ohms, and place your red positive probe on the capacitor’s positive pin (anode), and your black probe on the negative pin (cathode). The multimeter displays a few increasing readings before blasting up to infinity for a good capacitor.
There is more to these methods and additional techniques to test a capacitor for problems, therefore we will go through them in further detail. How To Pass A Drug Test(2023Guides)
Take the capacitor out of the circuit.
When a capacitor is still attached to a circuit, you can only examine it for problems with an ESR meter. This implies that checking a capacitor with a digital multimeter necessitates removing it. Take care not to harm other components in the circuit or the capacitor itself while doing this. To remove the capacitor from the circuit, the best method is to use a soldering iron.
Read Also: How To Be Healthy And Active
Discharge Capacitor
Capacitors retain some voltage even after being removed from live circuits. You gently discharge the capacitor to properly measure resistance and protect yourself from electric shocks.
To accomplish this, use a resistor or insulated screwdrivers to discharge the capacitor. To create a spark, connect a 20,000 Ohm resistor with a 5-watt rating to the capacitor’s terminals or place one insulated metal screwdriver between the two pins. You keep these two connections connected for around 5 seconds and then move to the next step. How To Become An Anesthesiologist
Set your multimeter to the 20k or 2m Ohm range.
Capacitors have resistance values in the tens of thousands or hundreds of thousands of Ohms. To accurately test the resistance of your capacitor with a multimeter, set it to either the 20k Ohms range or the 2m Ohms range represented by the omega symbol ().
The 2m Ohms range is the best option because you may get an infinite value soon after running the final step of our test. This is true if you set the multimeter to the 20k ohm range and the resistance is more than this figure. This is covered by the 2m range.
Place the probes on the capacitor pins.
When discussing polarized or electrolytic capacitors, the capacitor often has a positive and negative side. The positive side is referred to as the anode, while the negative side is referred to as the cathode. It makes no difference which probe you use on the positive and minus ends of the capacitor in this test. It is simply necessary to build a proper connection in order for the measurement to be accurate.
Read Also: How To Trick A Mass Air Flow Sensor(2023Tips)
Examine Multimeter Readings
You simply look at what the multimeter displays to determine whether or not the capacitor is operational. With a good capacitor, the multimeter displays zero (0) or a value close to zero, then gradually rises until it reaches infinity (1) or O.L. If this value never reaches infinity during the evaluation, the capacitor may be defective. How To Calculate Growth Percentage
You can also perform this test while the multimeter is in continuity mode. You wait for a beep from the multimeter before it displays “O.L.” rather than checking for values. If you don’t hear any beeps, the capacitor is faulty. Resistance and continuity tests aren’t the most accurate ways to check for problems with a capacitor. In terms of alternative methodologies, we can perform a direct capacitance test or a voltage test.
Capacitance Test
The capacitance test makes use of the secondary capacitance capability of more modern multimeters to get a direct value in Farads (F). This means you review your results and compare them to the specifications of your capacitor model.
Remove the capacitor from the circuit
As with the resistance test, you remove the capacitor from the circuit and use a multimeter to measure its capacitance. Be cautious when doing so.
remove the capacitor How To Make Bleached Hair Soft And Silky
Capacitor-Discharge Using a Screwdriver
Use a 20k Ohm, 5-watt resistor or an insulated screwdriver to discharge the capacitor. You must hold these for at least five seconds at the capacitor terminals.
The technique is the same as in the prior test.
Read Also: How To Stop Procrastinating(Tips)
Select Capacitance Mode on the multimeter
You should pay close attention here. As previously stated, the capacitance mode is frequently seen as a secondary function in higher-tier multimeters.
- To calibrate the multimeter, normally slide the selector to the capacitance symbol. This allows you to measure Farad directly.
- You must set it to a value greater than the capacitor value.
Connect the Capacitor to the Multimeter
Connect the capacitor to the multimeter directly or through the probes, depending on the model.
Check For Farad Reading
The specs of your capacitor model determine whether or not the capacitor is good. If the multimeter’s farad measurement does not match the farad standard of your capacitor, the capacitor is faulty and should be replaced. The example capacitor has a value of 9 microfarads. That is, it is correct.
But there’s more to it than that. Tolerance ratings for capacitors are commonly expressed as percentages. A tolerance rating indicates how far your results can deviate from the specifications. For example, capacitors of 1000F with a tolerance rating of 20% suggest that your results could range between 800F and 1200F while still indicating that the capacitor is in good condition. How To Forgive Yourself For Cheating(14 Steps)
- Finally, if you get an “O.L” reading, the meter may not be calibrated to measure farads or the capacitor is broken.
Voltage Capacitor Test
The voltage test tells you if the capacitor is holding the correct amount of charge while it is in use. A flaw in doing so might be the reason why the capacitor is causing the circuit to malfunction. Jumper cables and a voltage source are required here, with the voltage source giving a lower voltage than the capacitor’s rated voltage.
- A 9-volt battery, for example, for a 160-volt capacitor.
Read Also: How To Trick A Mass Air Flow Sensor(2023Tips)
Put on Safety Equipment
To prevent electric shocks, use insulated rubber gloves and avoid touching the multimeter leads, jumper wires, or capacitor during the operation. How To Clean An Evaporator Coil
Connect the battery to the capacitor pins using jumper cables.
While connecting the jumper wires with the capacitor removed from its circuit, pay attention to polarity. This is particularly important when working with polarized capacitors.
- Power sources, such as batteries, usually have positive and negative terminals, which should be connected to the corresponding capacitor pins. This guarantees that current flows appropriately between the two components.
- Connect one jumper wire from the positive battery terminal to the positive anode pin and another from the negative battery terminal to the negative cathode pin.
Check For Voltage Reading
Finally, a good capacitor is supposed to maintain the same voltage value as the power source. When tested with the meter leads, it displays this value and rapidly discharges through the leads to zero (0V).
- For example, a capacitor charged with a 9V battery causes the multimeter to display around 9 volts before quickly draining to 0V.
- If the multimeter does not display the correct voltage value, the capacitor does not retain a charge, is defective, and should be replaced. How To Change Layer Opacity In Procreate
It is critical that anytime you replace a capacitor or any other electrical component, you check that the replacement unit meets the same specifications as the defective one. This allows you to check the circuit’s compliance and operation. The capacitance value and operating voltage are the most significant characteristics to consider here.
Conclusion
Finding problems in a capacitor is a method that may be accomplished using different multimeter diagnoses. Despite the fact that the resistance test is simpler, the capacitance test is more accurate, and the voltage test allows you to identify even deeper faults. Whatever you choose, make sure you follow the safety precautions and always operate with capacitors according to the specifications. How To Cope With Annoying People
Read Also: How To Stop Procrastinating(Tips)